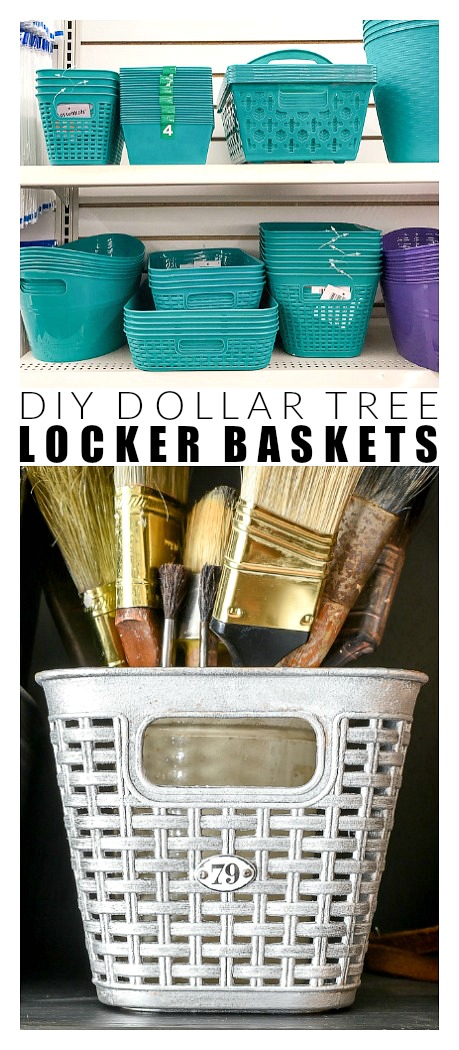
An easy way to turn Dollar Tree baskets into vintage-inspired locker baskets!
If you have seen any of my Dollar Store DIY makeovers, you know I love giving Dollar Tree items industrial and farmhouse-inspired makeovers.
Today, I'm sharing how I took plastic Dollar Tree storage baskets and turned them into vintage-inspired metal locker bins!
Some of my favorite Dollar Tree makeovers are storage items. Now these little storage baskets are at the top of my DIY project list!
SUPPLIES NEEDED TO MAKE DIY DOLLAR TREE LOCKER BINS
Affiliate links have been used.
- Fine grit sanding block
- Small chip brush
- Tabletop spray shelter (optional)
HOW TO MAKE DIY DOLLAR TREE LOCKER BASKETS
January tends to be when Dollar Tree stocks new storage items that they don't carry year-round. This year, I spotted storage baskets that I instantly knew would make perfect vintage locker baskets.
I have authentic locker baskets in my living room, so creating ones out of Dollar Tree baskets seemed like a no-brainer. I already had all the supplies, including the white locker plaques, which made this home decor makeover even more affordable.
STEP ONE: SAND
Lightly sand the Dollar Tree baskets using a fine-grit sanding block. This will scuff up the plastic just enough to give the paint a good surface to adhere to without scratching the baskets.STEP TWO: PAINT
Lightly cover the baskets with two to three coats of dark gray spray paint. It's best to do light even coats while letting the paint dry completely between coats.

These little locker tags/plaques come with brads that look like nails. I just slipped the brads through the holes in the baskets and bent them open inside the basket. You can also add a dab of hot glue on the back of the brads to hold them in place.
STEP THREE: APPLY RUB 'N BUFF
After the spray paint is dry, apply pewter Rub 'n Buff to the baskets using a chip brush. You want to dry brush on the pewter Rub 'n Buff and not cover up the dark gray paint completely. I found it best to squirt the pewter paint onto cardboard, dip the chip brush into the paint, and then dab off the access before painting the baskets.
STEP FOUR: ATTACH LOCKER TAGS
Now it's time to attach the locker tags. I could have used authentic locker tags, but I wanted to keep this project affordable and doable for everyone. The tags I used can be found for less than $5.00 on Amazon or at Michaels for around $3.00 with a 40% off coupon.These little locker tags/plaques come with brads that look like nails. I just slipped the brads through the holes in the baskets and bent them open inside the basket. You can also add a dab of hot glue on the back of the brads to hold them in place.
It's hard to tell in the pictures, but the variation of dark gray spray paint and shiny pewter Rub 'n Buff adds the perfect authentic touch to these DIY Dollar Tree locker baskets.
You can see a bit more of the variation in color in the view below.
I love how the baskets are plastic, but the paint combination makes them look like metal. The inexpensive "locker tags" are also a great addition that makes these simple Dollar Tree storage baskets look like vintage locker baskets.
I ended up moving the baskets into my office lockers. They're perfect for organizing tape and other shipping supplies for my Etsy shop!


Love the ideas for reorganizing my craft shop
ReplyDelete