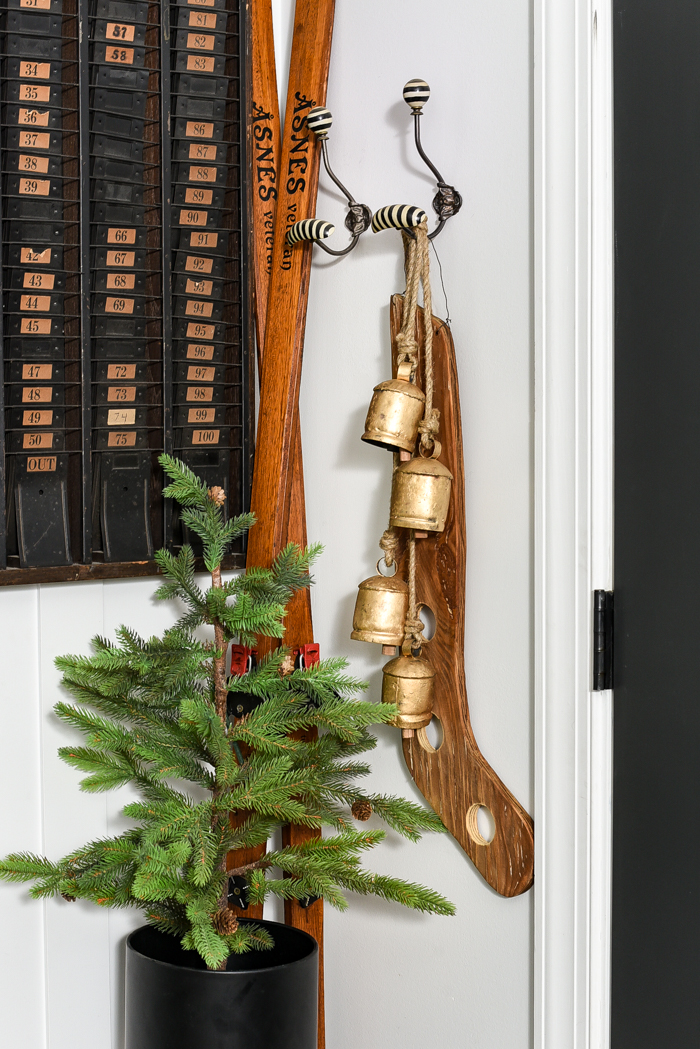
A primitive thrift store find gets transformed into an antique stocking stretcher!
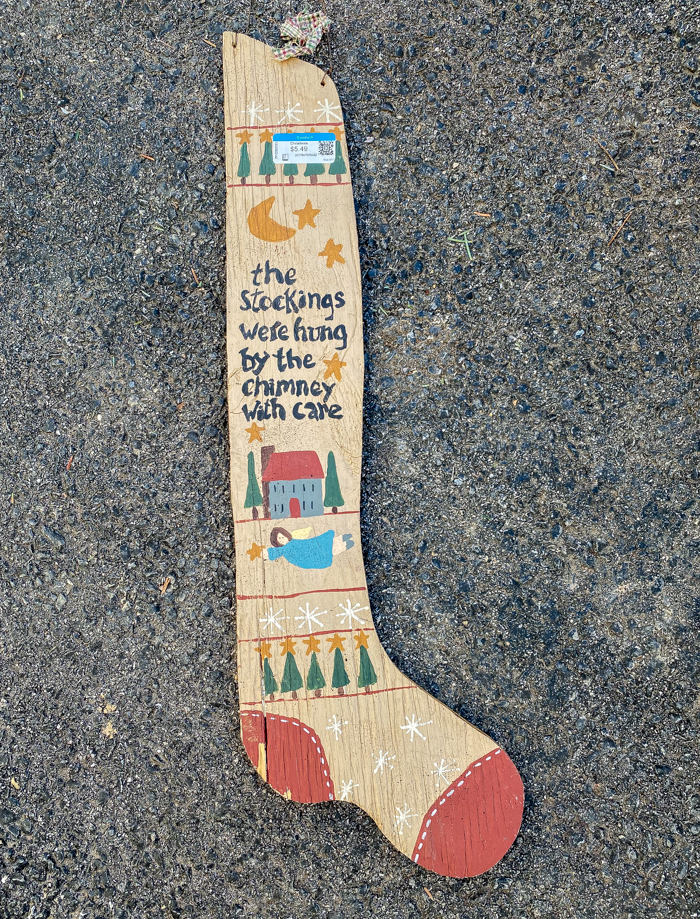
A quick stop at Goodwill yesterday resulted in another project and I'm not sad about it.
Thrifting has been very hit-or-miss lately, but I've been lucky to find a few affordable finds and fun pieces perfect for updating.
The other week, I transformed a dated wood wall calendar into an antique hymn board and this week, I snagged a handpainted primitive stocking that I turned into an antique stocking stretcher.
WHAT ARE ANTIQUE STOCKING STRETCHERS?
In the early 20th Century, wood stocking stretchers were used when drying socks. The stretchers allowed wool socks to dry and keep their shape without shrinking. Now, stocking stretchers make a great addition to Christmas mantels and holiday decor.
Now that you know a little more about stocking stretchers, let's make one out of a thrift store find!
SUPPLIES NEEDED
- Handmade dated wood stocking (I found mine at Goodwill. You could also cut one out of scrapwood)
- Jigsaw
- Drill
- Sander
- Sanding pads (80, 120 and 320 grit)
- Stain (I used Weathered Oak and Special Walnut)
- Pencil
- Two foam brushes (one for stain and one for sealer)
- Ruler
HOW TO TRANSFORM A THRIFT STORE FIND INTO AN ANTIQUE STOCKING STRETCHER
My eyes caught a handpainted wood stocking as I was quickly scanning the aisles at Goodwill. It was very primitive and not my style, but I knew it would be super easy to turn into an antique stocking stretcher.
TIP: Focus on the shape and material of items when you are searching for project pieces at thrift stores. The color can always be removed or changed, but the shape may not be as easy to alter, especially if it's not made of wood.
STEP ONE: MARK AND CUT
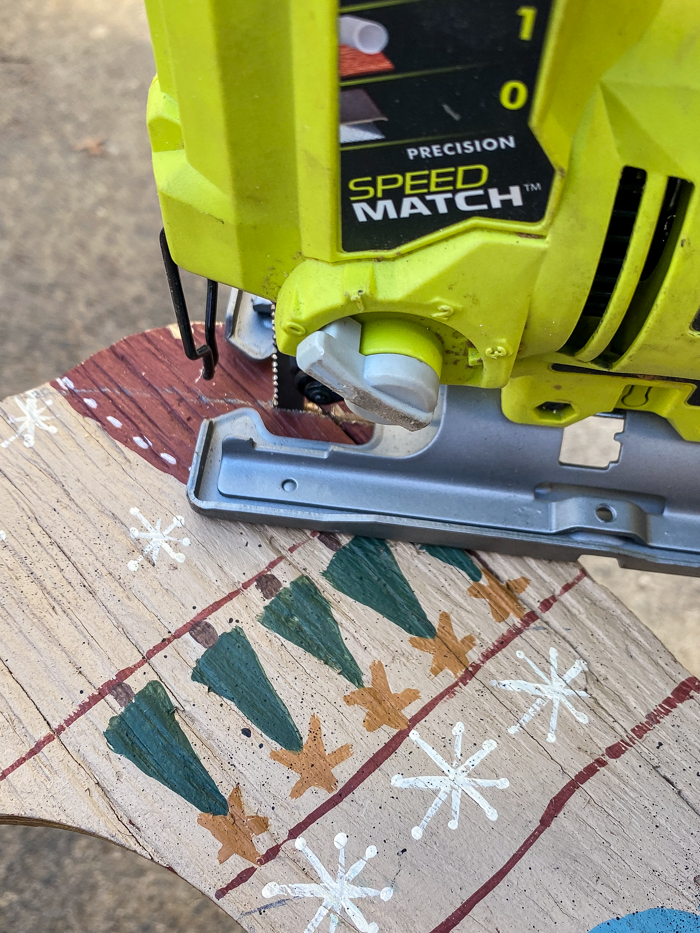
I started by using a pencil to mark where I wanted to cut the base of the stocking. To me, the curvy heel and toe made the stocking look a bit more country and less like a true antique stocking stretcher. My goal was to give the stocking more of an elongated stretched look.
Once I was happy with the template, I trimmed the wood stocking with my Ryobi Jigsaw.
STEP TWO: SAND
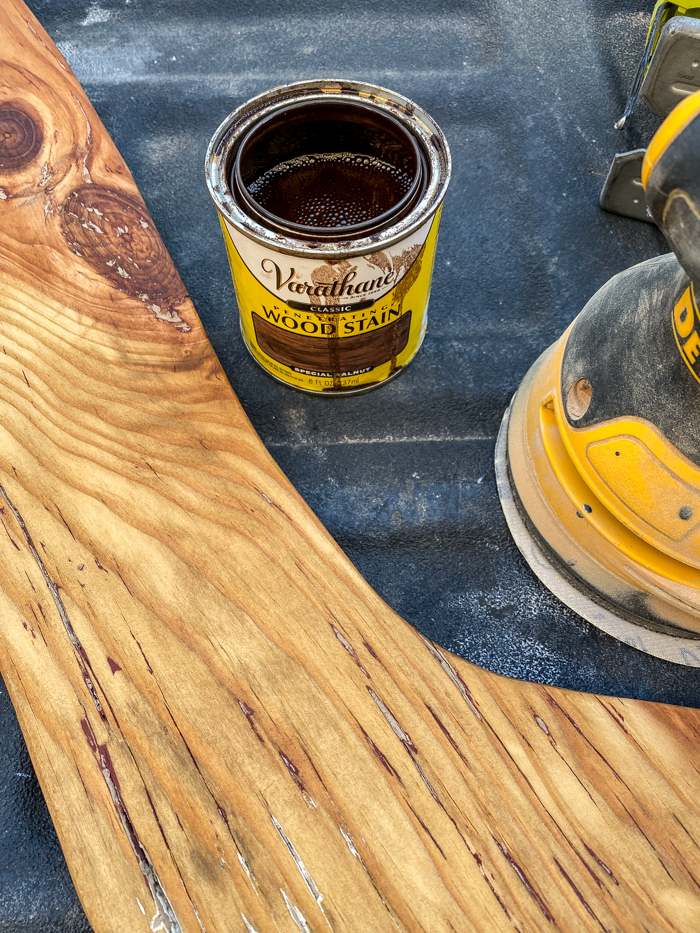
Now that the shape of the stocking looked more like an authentic stocking stretcher, I began sanding off the paint using a Dewalt Sander. I started with 80 grit sandpaper then worked my way up to 320 grit.
STEP THREE: STAIN AND SEAL
After sanding (I did leave a tiny bit of the original paint to give the stocking a little more character), I stained the wood with a layer of Weathered Oak and then a layer of Special Walnut. Once the stain was dry, I sealed the stocking with a quick coat of clear matte poly.
STEP FOUR: DRILL AIR HOLES
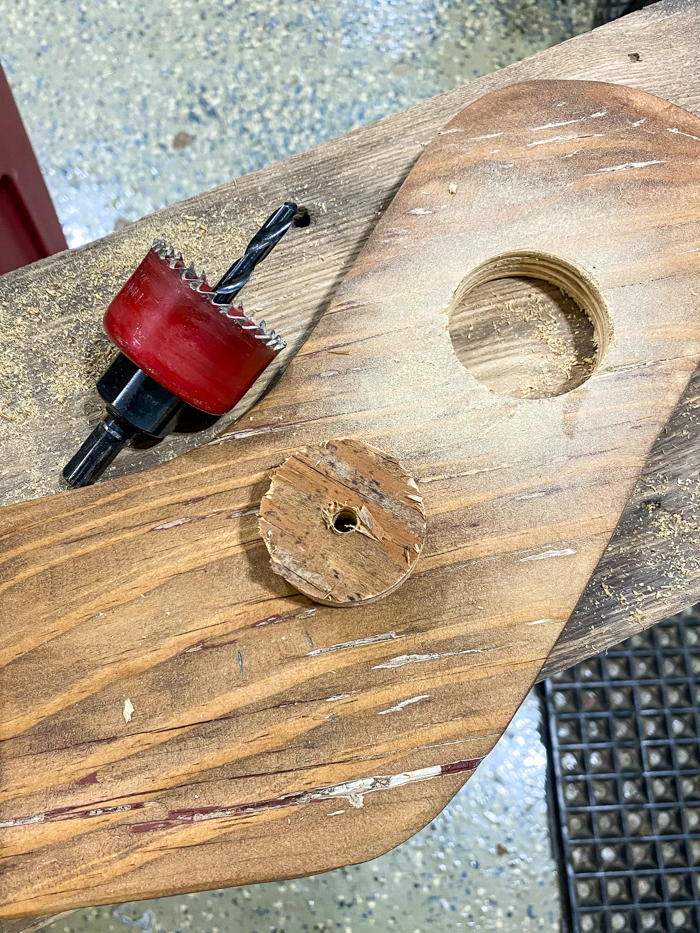
Initially, I wasn't planning on drilling air holes in my stocking stretcher, but I thought it would add a little more character and authenticity if I did. You don't have to do this step if you prefer a solid stocking or don't have the tools.
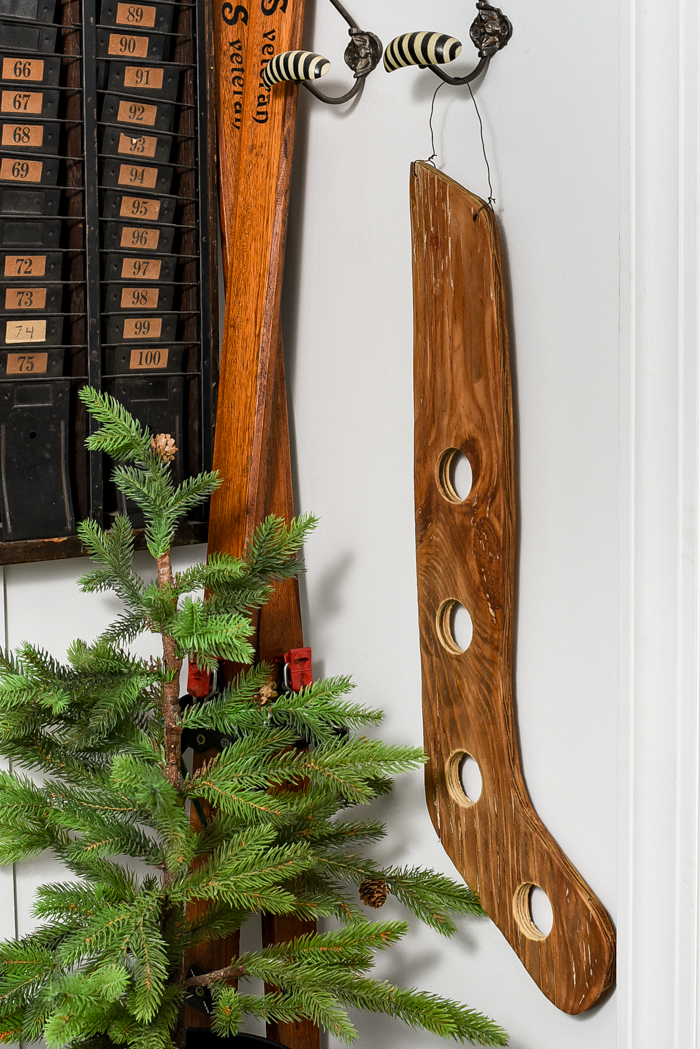
I started by measuring and marking where I wanted the holes to be then slowly drilled four holes in the wood using a 1 3/4" hole saw bit. After all the holes were drilled I lightly sanded the stocking to smooth out any rough spots.
IMPORTANT: Hole saw drill bits are very sharp and it's very easy to cut yourself when attaching and tightening them into your drill.
I hung the stocking using the original wire, which was old and rusty and worked perfectly. New wire or jute twine would also work well.
I feel like I say this after every project, but I really do love how this DIY antique stocking stretcher turned out. Creating vintage and antique items out of thrift store finds is becoming a new favorite hobby of mine. It's almost as exciting as the thrill of the hunt and finding an awesome authentic antique find!








Looks great. I and my sisiter will try it. I think it will have special meanings.
ReplyDelete