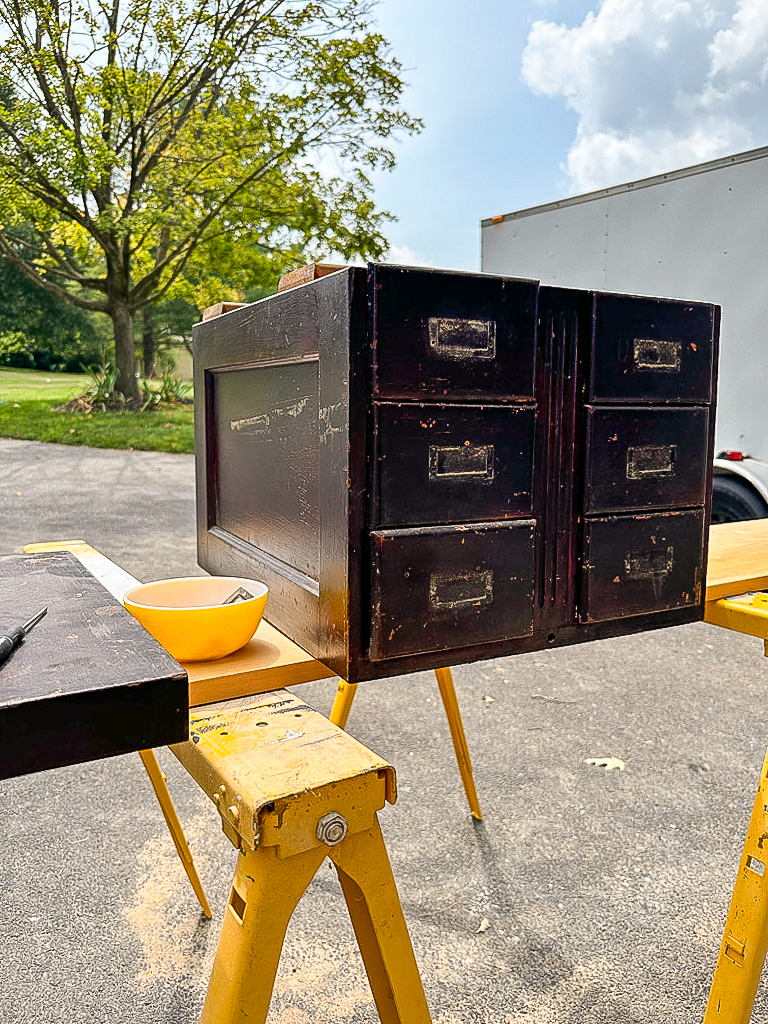
The best sanding tips and common mistakes to avoid when sanding and refinishing wood furniture!
Lately, my days have been spent painting and sanding as I prepare for a huge vintage market.
Showers have become overrated and being covered in paint and sawdust has become my new normal.
It's a busy time, but I wouldn't have it any other way.
I LOVE transforming and staging furniture and sharing my favorite furniture makeover tips.
In the past, I shared how to achieve the perfect raw wood look, but I still get questions from readers asking how to sand wood furniture.
Today, I want to answer all your wood furniture sanding questions and inspire and encourage you to transform your own wood furniture and DIY projects.
- SUPPLIES NEEDED TO SAND FURNITURE -
Affiliate links have been included.
- Dewalt Orbital Sander (or other circular power sander)
- Respirator (or dust masks)
- Sanding pads for sanders (80/120/320 grit)
- Hand sanding blocks (80/120/320 grit)
- Cleaner (I like this one from Dollar Tree)
- Paper towels
- Cerusing or Liming wax for sealing wood
- Lint-free cloth or tack cloth
- HOW TO PROPERLY SAND FURNITURE TO RAW WOOD -
1. PREPARE FURNITURE FOR SANDING
It's necessary to properly prep furniture before sanding. This may include wiping and cleaning furniture to remove stickers, glue, and grim and removing hinges, drawer and door hardware, as well as random nails, staples, and screws that may get in the way of sanding.
FAQ: IS IT NECESSARY TO CLEAN FURNITURE BEFORE SANDING?
Yes, cleaning furniture before sanding is highly recommended. Oils and dirt left on a wood surface may gum up sandpaper and/or damage the wood grain. It's best to sand a clean surface than risk grinding dirt and oil into the wood grain.
FAQ: WHAT IS THE BEST CLEANER FOR SANDING?
My favorite products for cleaning wood surfaces are Simple Green and Mineral Spirits. Both products break down grease and oil without damaging wood.
2. PICK THE RIGHT SANDER
There are many types of sanders available, but I like using an orbital sander to do the majority of my sanding. Orbital sanders are small, versatile, and easy to control, which makes them great for beginners. A Corner Cat sander is optimal for finishing the job and getting into corners and tight areas where an orbital sander can't reach.
3. CHOOSE THE RIGHT GRIT SANDPAPER
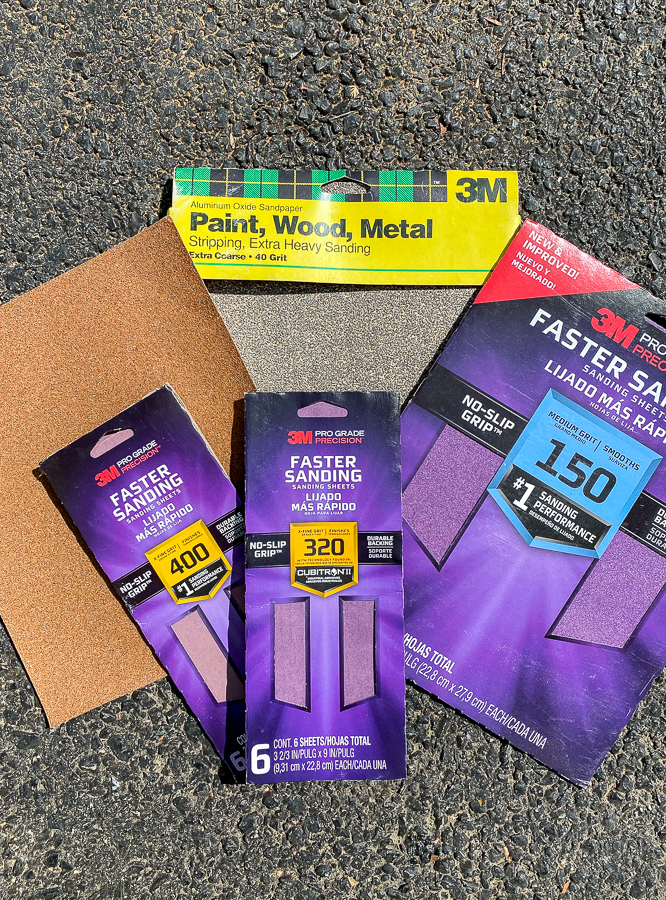
I can't even tell you how important choosing the right grit sandpaper is for achieving a clean, professional, and smooth finish. Lower grit sandpaper is much more coarse, while higher grit sandpaper is fine and smooth.
COARSE: 40-60 grit sandpaper. Ideal for floors, removing tough paint or stain, rounding corners, and shaping wood.
MEDIUM: 80-150 grit sandpaper. Medium grit is great for general sanding and removing old paint or stain.
FINE: 180-220 grit sandpaper. Ideal for scuffing up furniture before painting and smoothing out a woods finish
EXTRA FINE: 320-400 grit sandpaper. Perfect for use between coats of paint or topcoats and helps achieve a smooth clean finish.
I've worked with various grits of sandpaper and have learned a lot from stripping, refinishing, and painting hundreds of furniture pieces. My go-to combination for the perfect finish is 80-120-320 grit sandpaper.
I start with 80-grit sandpaper to remove any old finish and paint. It may take a little longer to get down to bare wood as opposed to using lower-grit sandpaper, but there is less risk of damage. Coarser grit sandpaper tends to "chew" up edges and molding and can cause unwanted damage to furniture.
Once most of the old wood stain is removed, I change the sandpaper to 120 grit to remove and blend in any remaining stain.I finish off with 320-grit sandpaper to smooth out and polish the wood.
***TIP*** If you want a scrubbed or raw wood look, don't worry about removing the old stain in grooves and crevices. The contrast adds depth, dimension, and character, especially for vintage and antique furniture.
4. DON'T RUSH
Sanding furniture takes time and patience and should not be rushed. Common mistakes when sanding wood furniture include rushing, sanding in the wrong direction, pressing down too hard on a sander, or forcing the sander along. These mistakes may cause swirl marks and damage, which can all be avoided by slowing down and taking your time.
HOW TO PREVENT SWIRL MARKS WHILE SANDING
Swirl marks are primarily caused by rushing, pushing the sander along, or using an improper technique while sanding. Slow down, keep the sander flat, don't press down, and let the sander glide along with the furniture, don't force it.
HOW TO REMOVE SANDING SWIRLS
If you do happen to leave sanding swirls behind, don't worry! You can easily remove them by changing your sanding pad to one with finer grit and then slowly sanding over the swirls until they are no longer visible.
5. ALWAYS SAND IN THE DIRECTION OF THE WOOD GRAIN
To avoid damaging wood fibers, always sand in the direction of the wood grain. Rubbing against the wood grain may leave unwanted scratches in the wood, especially if using coarse or medium grit sandpaper.
6. HAND SANDING
More often than not, hand sanding will be required to remove stain and paint that remain in crevices and corners where other tools are unable to reach.
SOME OF MY FAVORITE HAND SANDING TOOLS:
- Hand sanding blocks (80/120/320 grit)
FREQUENTLY ASKED QUESTIONS:
CAN YOU SAND VENEER?
Yes, you can sand wood veneer, but you need to be extra careful. Wood veneer is a very thin piece of wood commonly layered over pressed board. If you don't pay close attention you can easily sand right through the thin layer of veneer. An orbital sander (avoid using a belt sander on veneer) or hand sanding will be your best options.
HOW DO YOU DETERMINE IF YOU WILL REFINISH, RAW WOOD, OR PAINT A PIECE OF FURNITURE?
Most of the time it depends on the age, quality, and condition of a piece of furniture. If I need to change the placement of hardware holes, if there is damage to the veneer, or if I have to make repairs with wood filler, I typically will update a piece of furniture with paint.
If a piece is antique and has character, but is not necessarily in the best shape to be refinished then I will strip it down and give it a raw wood look.
I typically only refinish furniture if it's a vintage card catalog or a good-quality mid-century modern piece.
WHAT DO YOU USE TO SEAL RAW WOOD FURNITURE?
If I want to give a raw wood piece of furniture extra protection, I will seal it with Liming or Cerusing wax. Both products help to protect wood without darkening or changing the color and cut any orange tones that are typical of scrubbed pine.
Sanding a piece of furniture down to raw wood can be time-consuming and messy, but the final product is always worth the effort!


Hi Katie,
ReplyDeleteThanks for sharing these tips. There is nothing more gorgeous than real wood brought back to life (and saved from the skip) by refinishing.
You always have the best furniture makeovers. Awesome!
ReplyDeleteI just love the look of the sanded furniture! Thanks so much for all the information! I'll be pinning this for the future!
ReplyDelete